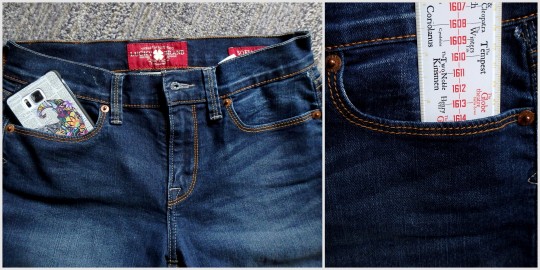
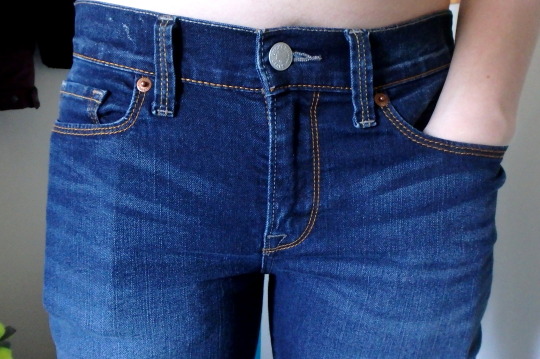
So I don’t know about you, but I’m often frustrated by the ridiculous smallness of girls’ pockets. At a bare minimum, I need to be able to shove my cellphone in there – come on, pants companies! So what I started doing was making myself pocket extenders. I’ve done this several times, for pants and shorts. It’s great.
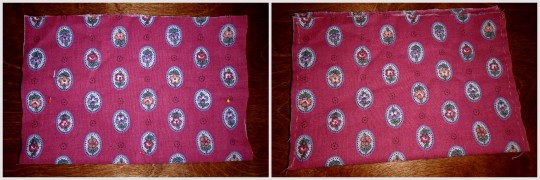
I just got this pair of jeans, so I thought I’d show you how to do it. I kind of feel like it just hasn’t occurred to some of you that this is an option, so maybe now it will. All you need is your pants, some fabric (I just took a random piece from a scrap bin), a needle, and some thread (thread doesn’t even need to match the fabric since literally no one will see it).
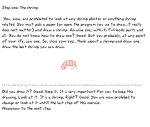
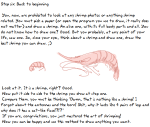
See? Ridiculous. Like, half a cellphone, or only 2.5″. Useless.
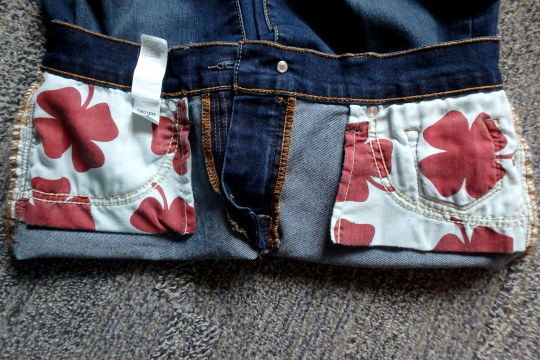
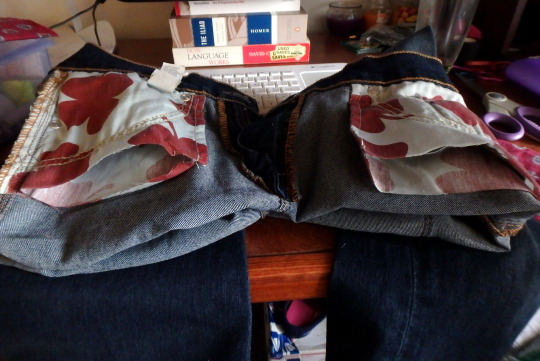
So turn those inside out to expose the pockets.
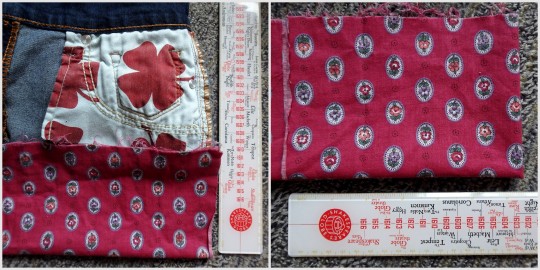
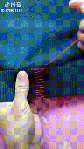
Figure out how big you want your pockets to actually be. I kinda go by whatever looks like might be right. I didn’t
really measure them. Fold the fabric in half, so you have a pocket, and
then fold it in half again so you can have two equal ones.
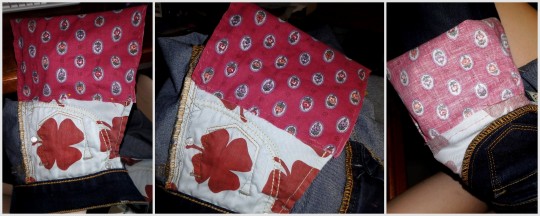
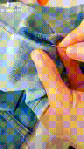
Try to get the edges to line up enough, pin it in place, then sew up the sides! Are your stitches crazy uneven and wonky looking? Doesn’t matter; nobody’s going to see it. These are in the inside of your pants. The only thing that matters is that it holds up. So I double-did the corners, since those tend to get the most stress.
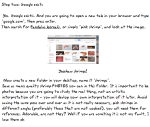
Cut open the bottom of the existing pockets.
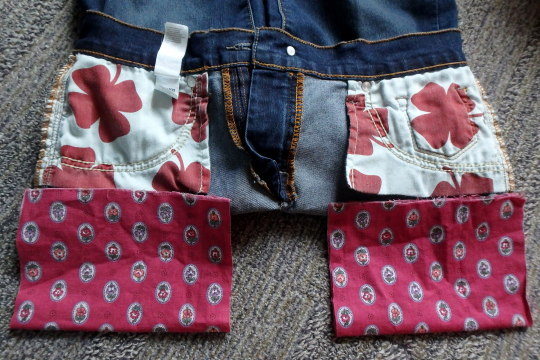
Pin it in place, then sew around, joining the new pocket to the old pocket. I did this by keeping my hand on the inside, so I wouldn’t accidentally sew through the other side. Again, I reinforced the corners, and didn’t worry about what it actually looks like. Then I turned it in side out to make sure the inside was all joined properly.
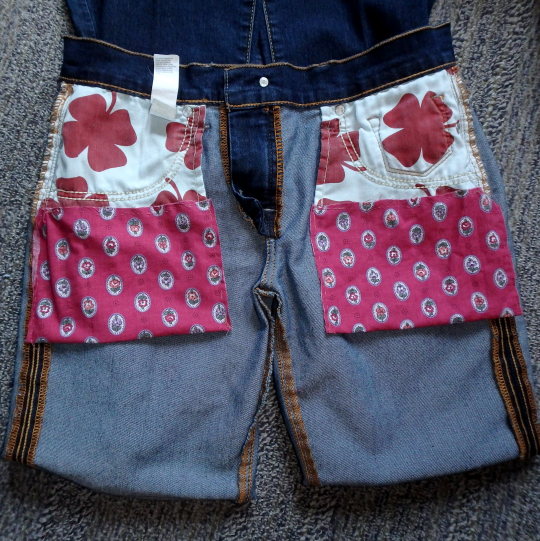
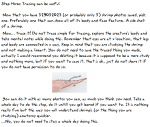
Yay all done! And the pockets are so much bigger now!
Whaaaat I can fit my entire phone and entire hand and probably something else now, are girls’ pockets even allowed to do that?! Heck yeah they are.
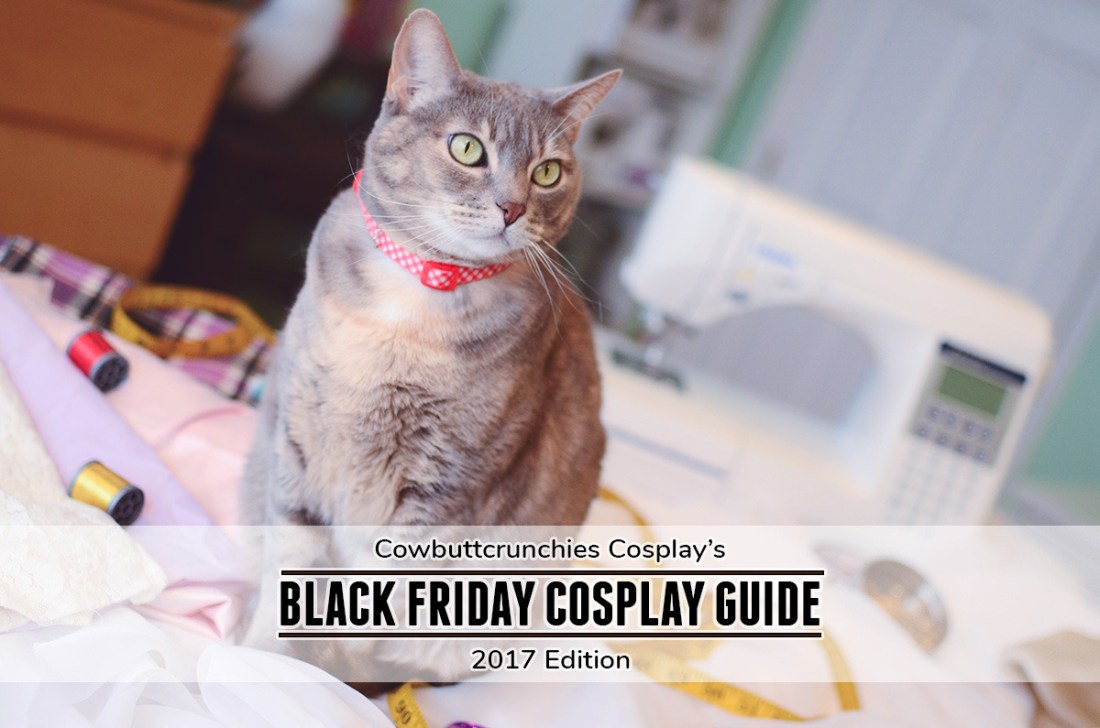
It’s time for our yearly Cosplay Black Friday roundup!!! If you’re looking to stock up on wigs, lenses, makeup, or fabric for the 2018 con season, now’s a great time to do it – check out the below guide, comment with more vendors, and be sure to share with your friends to help out your fellow cosplayers!
*~*~*~*Circle Lenses*~*~*~*
Uniqso (http://bit.ly/2AkTvm1) Fri Nov 24th onward: Up to 50% off lenses – you can also stack an additional 10% off everything for up to 60% off with our coupon CBC along with the above link
Candylens (http://www.candylens.com) Fri Nov 24th onward: 40% off lenses with the coupon code BF402017
*~*~*~*Wigs*~*~*~*
Arda Wigs (http://www.arda-wigs.com) Mon Nov 27th: 10% off the entire site. Orders over $70 receive a free factory sample wig while orders over $100 also receive a free makeup gift Tues Nov 28th: 15% off the entire site. Weds Nov 29th: 20% off the entire site. All three days: 45% off discontinued wigs Discount codes will be released to Arda’s site and social media at midnight
Okay so i got a few notes on how i go about Environments/Landscapes…so i’ll share a method thats easy to work with….bare with me its been a little while since ive drawn them Lol
First thing you want to start of with in your gradient background…use what ever is your preference. Depends on the setting, ima do some type of desert/dusty place.
You’ll learn that the Lasso tool is gonna be your bae when it comes to environments…that and its pretty useful. Now your going to be working in three tones, 1.Dark 2.Mid 3.Light and it will always be the darkest at the front fading to light towards the back…make sense? So you will have three layers for each one to make your life easier and Lock those layers so you will only color within that area. Make sure the dark layer is on top.
Here is where the fun kicks in…we add our dets, try to stay with each tone and dont end up making it all muddy so you cant distinguish each one. Now you can go about this any way you please, you can paint it all in with one brush ( for some reason people get anal about shit like that, thinking there great for using one brush…i think if you got tools use em if you know how to do it right.) Or you can use custom brushes…since this is a tut ill mostly use custom brushes to slap stuff around. Its up to you really, also use the lasso tool like i said its your bae.
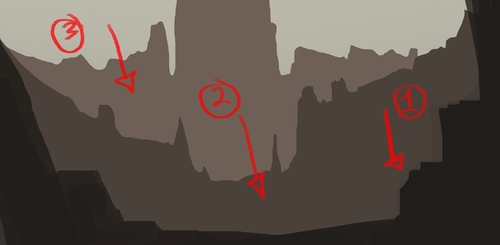
The lasso can help define things better for you, so i wanted to add a structure type on the third layer. If you want to give an effect that the selection ive made is in front of the background right click your selection and invert it, add some lighting around the edges…only a little though you dont want to over do it.
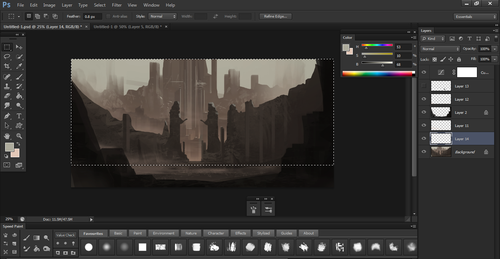
Also if you’ve done something on a layer you dont want to mess up or paint on what you can do is create a clipping mask on that layer. Its kinda like locking the layer to that one so you dont go outside of the layer or ruin what you worked on. Make a new layer above the one you wish to attach it to and right click the newlayer, a menu will pop up, your looking for clipping mask. Once you clicked it the layer should look like what ive circled.
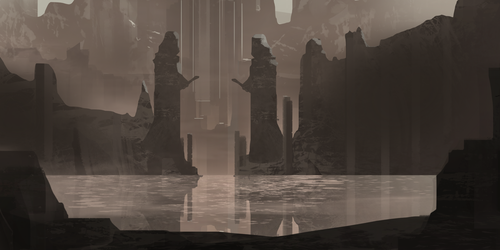
Once your done working on each layer we are gonna put in some mist effect, this is something that helps separate each section. So make a new layer between each of your three as shown in the image. Like i said you can use what ever method you like, i just use a soft brush or cloud/mist brush to get what i want.
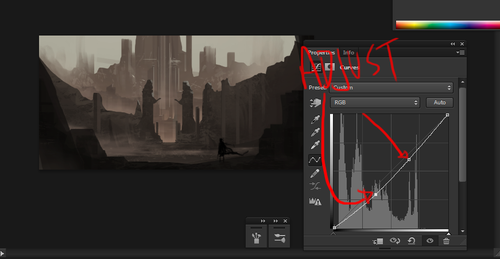
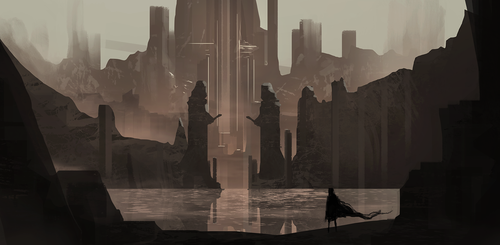
Now we are going to add some definition to the image a good one to use is Curves. You can find this where your layer menu is, at the bottom you’ll find it, ive circled what your looking for. On the third image is what will appear when you click curves, all you need to do is drag the little square and you’ll see some magic happen. So adjust it to your preference. If you want you can also mess with brightness/contrast too. ALSO i would recommend adding a person in the image, it gives you an idea of the scale your environment is.
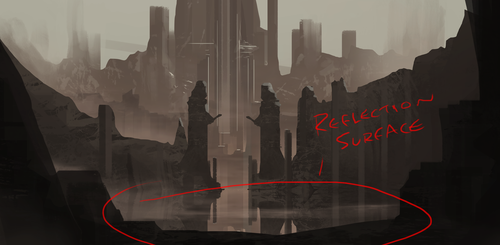
I was going to end it there but hey, ill show one last thing…its pretty simple. and that is some water reflection, we are going to turn the middle into water instead cause its a little boring right now. I merged all layers but the first one, you then want to make a selection and copy/paste. Free transform in the shortcut is ctrl T and do a vertical flip on it then adjust so its mirroring the top.
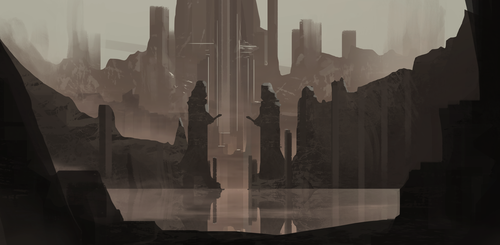
Now make a clipping mask like i explained earlier on the reflected surface and use the radiant tool…i think its called that lol it gives it more of a water surface like you see. For the image below it i used a custom brush which creates a water effect, aaaaaaaaaand bam you got you water now covering the area…easy huh.
And so this concludes the Tutorial and you have the end result. Hopefully that gave some tips on how to approach landscapes…they can be confusing sometimes on where to start. Enjoy and let me know if it was useful or not 😛
Beard Tutorial. Because not everyone wants to, or can go on T! (Or maybe you’re just waiting for your ‘stache to arrive and it’s taking it’s sweet time getting to the party!)
Queadlunn- Over the last year and a half I’ve learned a lot about electronics and Arduino and how I can apply it to props and cosplay. Just some simple LEDs in a sci-fi gun, a couple fans in a helmet or making a microcontroller light up some programmable LEDs when I close a switch on a DIY-ed lightsaber can really add to a project.
On basic circuits: If you have a battery (say 2 AA cells) you should be able to find out the cell voltage (for AA cells, it’s 1.5v per cell. This is easily google-able for most batteries) and if you know the voltage you have, you’ll know what kind of parts you can use with them.
For our 2 AA example, that’d mean you could use LEDs rated from 2.8v to 3.5v pretty safely, any more or less and it’ll take extra work and/or parts.
On Arduino/Microcontrollers: These are a lot more complicated than a battery, LED and a switch but can open up a whole world of options. From sequenced LED flashing, accelerometer-based triggers, even sounds. Sites like Arduino and Adafruit have amazing tutorials to get started. Arduino and like controllers are programmed via USB connection (sometimes through an adapter) and use a language that is a variant of C I believe.
You don’t have to be able to code from scratch to be able to use Arduino. I’ve gotten by with using the demo and tutorial code from various sites and modifying it a bit to suit my needs. I’m pretty bad at coding but good tutorials help wonders.
A good Arduino starter kit can be a great way to begin.
Online sources (these are where I buy 95% of my parts):
Adafruit (https://www.adafruit.com/) – An amazing source, my favorite. They have loads of pre-built boards, everything from Arduinos to sensors to power supplies and an entire ‘wearables’ section. Adafruit has amazing tutorials for almost all of their products, this is where I learned the most while I was getting used to working with Arduinos and the like. Their Feather Arduino boards are awesome!
Sparkfun (https://www.sparkfun.com/) – Another great source. A bit more barebones than Adafruit (not as great with tutorials on products) but still a great place. I’ve mainly bought basic components and sensors here.
Amazon (https://www.amazon.com/) – If you know what you want, you can probably find a version of it here, though maybe of a different build than other sources. As always, Amazon Prime is amazing.
Ebay (http://www.ebay.com/) – Like Amazon, if you know specifically what you want you can probably find it here, though with little to no documentation or support. Ebay’s a pretty good place to get lots of basic components like LEDs, wire or pin headers.
hey!! sorry to hijack this post, but there are a bunch of ways you can make videogames without knowing shit about computers!!
for starters, there’s Twine, which is fucking great for making all kinds of interactive experiences (it’s what Crystal Warrior Ke$ha was made in so you KNOW it’s good) at all skill levels (i picked it up and made a game in two minutes a few nights ago)
if you want a bit more involved experience there’s Inform 7 which is a simple language for text-based adventure games that reads like slightly-weird English and also relatively easy to learn
you can do some pretty fucking cool stuff with Unity (my personal engine of choice) but you may need to dig a bit farther to get at the good stuff. there’s lots of really good presets though (i made an entire game just mixing and matching pre-existing templates and adding in my own art, won an award at a game jam for that one) and if you want help the community’s pretty dang friendly from what i’ve seen!
this is just a taste of what’s out there from what i’ve seen, but there’s so many cool resources out there. if anyone wants help getting started, i’m around to give you a leg up on making something in the coolest, most unexplored art medium around!
I’m addin’ to this post because lowering the barrier to entry for making games is super important to me!!!! If y’all have any questions about making games, you’re welcome to come and ask! I made this list a while back with some friends, so it has some of the programs John already mentioned.
2D Editors:
GameMaker : Potential for pure drag-and-drop “programming”. It is recommended to read-up on the program’s functions to make good use of it. Good for prototyping. Uses its own language called Game Maker Language (GML) that is similar to a C language (e.g. C++ or C#). For both Mac and PC; free version available.
Construct2 : Drag and drop level editor that uses an “If-Then” event sheet structure for programming. Good for prototyping and for beginners. For PC; free version available.
GameSalad : Drag and drop with no code requirement. Good for programming. For both Mac and PC; free version available.
Solpeo : HTML5 based game engine for 2D and isometric game development. Some programming knowledge needed. Platforms supported: Chrome, Firefox, Internet Explorer 9+. Free version available.
Stencyl : Drag and Drop “programming,” templates you can edit the variables/values for.
Scratch : Lego-block-style coding platform by MIT; totally free and a great intro to thinking in code. Very kid-friendly and comes with a community site. Browser version available.
3D Editors:
Unity : 3D editor that creates 3D games. Can build games for browser, as an app, or for mobile devices (iOS and Android). For both Mac and PC; free version available.
UDK (Unreal Development Kit) : Full-fledged, highly advanced editor. Features a complete set of tools that go from level design to visual scripting to cut-scene creation. Uses it’s own programming language called Unreal Script that can be arranged with Kismet, a visual code editor. For Mac and PC; free.
2D Art/Animation Software:
GIMP : Free photo editing and digital painting software.
Easy Paint Tool SAI : Free digital painting software with a UI similar to Photoshop.
Mischief : Free digital painting software with an endless canvas.
3D Art/Animation Software:
Sculptris : From the company that created Zbrush, this free software is ideal for beginning 3D sculptors.
Maya : Animation, VFX, lighting, and rendering software.
Magical Voxel : Voxel Art (3D Pixel Art). Very intuitive and quick to pick up.
SketchUp : Architectural modeling software, great for creating 3D environments and buildings. Free version available.
Text-Based Games:
Twine : Create interactive text stories using Twine’s visual map system that links your game together. Easy to learn and use. End result is browser-based. For Mac and PC; free.
Quest : Interactive text stories that you can build in-browser.
Ren’Py : Create visual novels using a modified version of Python that reads like a combination of stage directions and a CYOA novel. For PC, Mac, and Linux; free.
Audio Resources/Editors:
Indie Game Music : This site offers free indie music with no need to worry about royalties or licenses.
Audacity : A free, open-source, cross-platform sound editor that allows you to record and arrange sound.
Super Flash Bros. : This site allows you to record theremin-like (8bit) sounds and export them as .wav files for your games.